YEG Guide: A Day on 124 Street

Mural by Jill Stanton

Edmonton is a city filled with small pockets of community. 124 Street is definitely one of those spots. If you were driving by on a regular day, it might not strike you immediately as the place to be. It doesn’t have the same historic vibe of Whyte Avenue and it’s not situated right in the downtown core like 104 Street, but it is long-established, bridging the neighbourhoods of Oliver and Westmount as well as Glenora to the west.

I grew up around here, and it’s still one of my favourite areas to visit. With businesses lining the road all the way from Jasper Avenue down to 111 Avenue before turning primarily residential, there’s something for everyone who stops by.

Here are my recommendations for a day on 124 Street:


Breakfast or Brunch

The frittata with multigrain toast.

Urban Diner (12427 102 Avenue)

This is a staple of High Street. It’s a go to spot for weekend brunch with the line sometimes out the door. But, it’s hearty food that will fill you right up.

The interior of Canteen…very modern and industrial.

Canteen (10522 124 Street)

To be fair, I’ve only ever been here for dinner, so I can’t necessarily speak to brunch. However, their evening menu is fantastic and I’ve heard nothing but good things about the weekend fare.

Snickerdoodle, Strawberry Cheesecake, Birthday Cake, All the Reese, Ode to Sunshine and Triple Play

Destination Doughnuts (10548 124 Street)

If you’re more the type to get a grab and go snack for breakfast at Timmies, this might be for you. It’s just a much more indulgent version of the yeasty treat. Flavours like the Triple Play (hickory sticks, ripple chips, and caramel on chocolate glaze), Strawberry Cheesecake, or Snickerdoodle will have you coming back for more in no time.


Shopping

Arturo Denim (10443 124 Street)

My fiancé and I happened upon this workshop at random while walking along 124 Street one day. Turns out that they make denim jeans locally right from this small space. Upon purchasing, they will provide free tailoring to ensure a perfect fit. I mentioned the business to a friend of mine and she swears by them. They also sell some other vintage clothing as well as fun pins and patches.

Henry’s Interiors (10247 124 Street)

This shop has been located around this neighbourhood for as long as I can remember. They provide interior design services alongside ample eclectic home decor to make your house a home. The styles on offer vary, allowing customers to mix and match to their own tastes.

Listen Records (10443a 124 Street)

This is a haven for LP lovers; the racks are stuffed with music from all genres. They sell both new and used items, and if you have anything you want to pass along, feel free to bring it by to see if they’ll buy it off of you.

Red Ribbon (12505 102 Avenue)

Open since 2002, founder and owner Rychelle has carefully curated her shop to include clothes, accessories, and gifts for women, men, and children. I have always loved poking around the underground store looking for a new treasure.

Salgado Fenwick (10842 124 Street)

Originally more of a market find, these small-batch silk-screened garment makers decided to open up a storefront about 4 years ago. Not only will you find limited edition printed tops and accessories, but you can also pop in for a coffee at Barking Buffalo Cafe, which shares the same space.

So Pretty Cara Cotter (10120 124 Street)

Previously, local jewelry designer Cara Cotter focused on growing her business internationally with by appointment only meetings available in her Edmonton studio. Yet, recently, she partnered with Pura Botanicals to open a joint flagship store. There, you’ll find beautifully crafted pieces made with semi-precious stones, solid 925 sterling silver, 18K gold, rose gold, and gunmetal vermeil (heavy plated over sterling silver).

The Prints and The Paper (10725 124 Street)

I love this shop! Looking for something unique for your home? This is the place to go. They showcase numbered limited edition silkscreen prints signed by the artist alongside vintage Edmonton imagery and maps. They can custom frame pieces for you, too. While you’re there, take a gander at their collection of books, travel guides, and cards. The center counter holds it all while allowing patrons to peruse at their leisure by providing stools along the perimeter for them to sit and flip through everything.

124 Grand Market

Located at 108 Avenue and 124 Street on Thursdays between 4pm and 8pm, this outdoor market runs from early-May to early-October. On Sundays from 11am to 3pm between June to September, the market moves to 102 Avenue and 124 Street. You’ll find a number of local makers setting up their tents every week. Everything from fresh floral bouquets to preserves and baked goods to clothes, there’s something to interest the whole family.


Midday Snacks & Treats

Key Lime Tart from Duchess Bake Shop

Duchess Bake Shop (10718 124 Street)

It’s impossible to make a list about 124 Street without including this world-renowned bakery. If you’re nearby, stop in to have a croissant sandwich for a light lunch, or pick up dessert. My personal favourite is the key lime tart, but their macarons and shortbread cookies are fantastic as well. On a hot day, pop over for a pint of their newly launched line of ice cream!

Cococo Chocolatier Bernard Callebaut (10103 124 Street)

Treat yourself to some Canadian-made chocolates and then sit down in their cafe over a beverage or a cup of gelato. It’s a relaxing spot with some free parking right in front.

Remedy Cafe (10310 124 Street)

One of Edmonton’s greatest success stories is this cafe. They’ve now expanded to 6 locations citywide, including their spot on 124 Street. Known for their chai lattes (I enjoy the lassis, too) and samosas, they also cater to those with food sensitivities and dietary restrictions by offering many gluten/dairy-free and vegan friendly Indian and Pakistani meals in addition to a variety of drinks and desserts.


Activities

Table Top Cafe 2.0 filled will customers on a Saturday evening.

Table Top Cafe (10235 124 Street)

Well-stocked with board games, this is the ideal spot to gather with friends and family for some old-fashioned fun away from electronics. For just $7 per person, you can stay and play for as long as you want. They even serve beverages (alcoholic included), snacks, and sandwiches to keep everyone energized. Plus, if you really love a game, they may have new packages in stock to take home.

Instagrammable Walls Walk

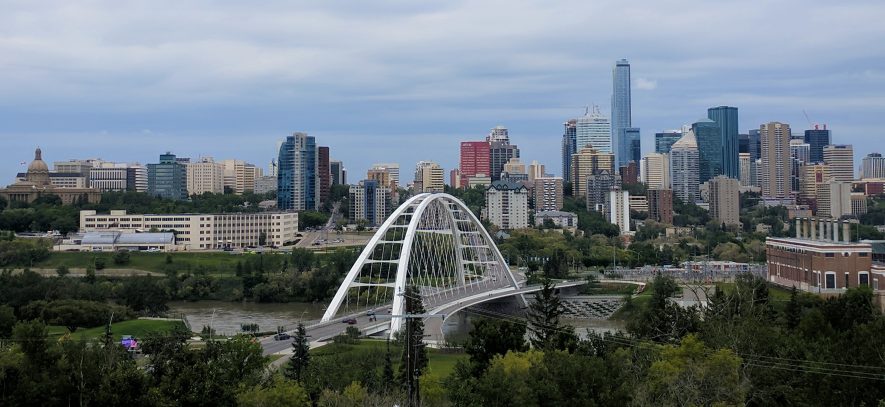
This area is home to a number of interesting and colourful murals. There’s one by artist Jill Stanton (10803 124 Street; see photo at the top of this post), another that maps the neighbourhood on the wall of Peter Robertson Gallery (104 Avenue and 124 Street), a third showcases the city skyline (108 avenue and 124 Street), and there’s also a geometric piece with animals tucked on the side of the building that houses Meuwly’s (10706 124 Street). You’ll discover many more photo ops in the vicinity. You just need to keep your eyes peeled for walls that can make good backdrops. They’re literally everywhere!

Gallery Tour

Sometimes 124 Street is called the Gallery District because, in the span of just a two-block radius between 103 and 104 Avenues, you’ll come across nine out of the ten located in this neighbourhood. Included are Bearclaw Gallery, Bugera Matheson Gallery, The Front Gallery, Lando Gallery, Lotus Cafe & Gallery, Peter Robertson Gallery, Scott Gallery, Udell Xhibitions, Wakina Gallery (10632 124 Street; may be by appointment only), and West End Gallery. Twice a year, seven of the businesses participate in an official Gallery Walk, opening their doors for a celebration of art. The next one is scheduled for Fall 2019 from September 21 to 22, but feel free to visit any other time during regular hours.


Dinner & Late Night

Dipping the Croque Mon’Soubise’ in sauce.

Partake (12431 102 Avenue)

Delectable rustic French cuisine in a cozy and inviting space. That’s how I’d describe Partake. It’s fairly new to the restaurant scene in Edmonton, but it was brought to life by the same owners of Urban Diner and the recently closed (lease was up) The Manor. They’ve got years of experience up their sleeves and the thought that they’ve put into this menu shows. Walk-ins only, so if you’re close, pop your head in and see if they have space to accommodate. You’ll certainly want to linger over the food and cocktails once you’re there.

Tagliatelle Florentine

Nuovo Bistro (10721 124 Street)

Want a hearty meal of Italian pasta? This is a great local spot. The dishes are flavourful and filling, and while the venue is small, it’s friendly. The place is also quiet enough to carry on a conversation while still being somewhat lively. They also have decent daily promotions such as half off appetizers on Sundays.

Super Combination Platter for Two

Cosmos Greek Kitchen (10812 124 Street)

Just get the Super Combination Platter. If there are three or four of you, go for the platter for two. It should be enough to feed everyone. Kirk and I ordered this for the pair of us and it fed both of us for almost three days!

Butter paneer (or chicken) is perfect during the winter months.

Nosh Cafe (10235 124 Street)

Right next to the aforementioned Table Top Cafe is this Indian restaurant. It’s my go to for a quick meal of butter chicken or palak paneer. They also have a daily wing and beer special that’s perfect for a midday snack.

The dining room of RGE RD.

RGE RD (10643 123 Street)

When you have time and money to spare, go here. Take the Road Trip, a multi-course meal that starts at $89 per person. The chef will take your palate on a journey from the east to west coasts of the country.

Arcadia Bar (10988 124 Street)

This is a very intimate bar with minimal seating. But, they stick to local brews and they’re open late Thursdays to Saturdays.

Edmonton Things To Do: Design A Sign by Paint Nite

The products of our Design A Sign night.

A few years ago, Paint Nite infiltrated Edmonton’s night life. Taking over bars across the city almost every day, it was a great way to dip one’s toes into the creative realm while hanging out with a friend or two. Combine that with drinks or food, and it was a pretty perfect evening, if I do say so myself.

I was obsessed with Paint Nite, wanting to sign up for one after another. In fact, I enjoyed the practice so much that I ended up purchasing my own portable easel, canvases, brushes, and acrylics so that I could work on art outside of those occasions, too.

Even owning all of the materials needed to do the same thing in the comfort of my home, I still attend them every so often. Simply put, it’s a fun time. As the Paint Nite brand has expanded, so have their event offerings.

I have previously tried Plant Nite (terrarium building) twice. While I always leave hopeful that my miniature gardens will survive, sadly, I’ve come to the realization that I’m probably not meant to be a plant mom. I just do not have a green thumb at this point in my life and I can’t continue to spend the money on something that will ultimately die.

Alas, the makers of Paint Nite introduced Design A Sign locally sometime last fall. It’s not exactly game changing or anything. There are already a few other businesses that run similar types of parties, but they tend to charge between $70 to $100 per person. Paint Nite is $65 plus tax each, including the $20 material charge. They also regularly offer discounts through their website, so it’s easy to participate for less than that. If you can’t find a discount directly from them, purchase a Paint Nite Groupon. Although they state that they’re for Paint or Plant Nite, I’ve tested it and the voucher is applicable towards the total cost of Design A Sign when redeeming.

Kirk and I went to a Design A Sign night with another friend in December. It took place at Sixty 6 Bar N’ Grill inside Londonderry Mall. It seems like all of their upcoming events are happening at the same location (hopefully they’ll expand to other area around Edmonton as this is quite out of the way for us).

Waiting to get started with our stencils and wood.

We arrived early to get some food before things officially launched. The host saw us and asked if we were there for Design A Sign. When we said yes, she allowed us to pick out our pieces of wood and to save spots at one of the prepared tables. I guess for this particular event, the place where they had purchased the wood had made a mistake with sawing the pieces as some were a tad shorter than they should have been, but we got to choose first, so it wasn’t an issue for us. The cuts we selected were technically stained, too, so they already had a nice tint to them.

Once we settled in for Design A Sign, we each had to join our two slabs of wood together using flat metal braces, screws, and an electric screwdriver on the backside. We also received tiny screws and a little hanger to attach. When that was done, we flipped our now larger boards over to work on the front.

We were instructed to select a colour of paint from the many options available. I filled a small 1.5″ diameter cup with a few millimeters of acrylic and then I topped off the cup with water. Stirred together, it created a wash that I applied with cloths to the wood. The makeshift stain worked quite well, especially when using darker colours. I chose a silver paint that was much more subtle, leaving a nice shimmery sheen visible when the light hits the wood just right.

When the base dried, I then took my stencil (selected in advance when purchasing my ticket online; there are dozens of different signs to choose from) and peeled the paper backing from them. It left an adhesive that allowed the stencil to stick to the wood. Any card I could find was then used to push out the air bubbles. TIP: Upon pulling the paper backing from the stencil, try to keep the full stencil together. Don’t allow the cutouts to come up with it. By ensuring that it’s in one piece, it’ll make things much easier later.


With the stencil now attached to the wood, I could then peel off the cutouts to reveal the design. Do a thorough once over to make sure that all of the parts that should be taken away are gone. Since I had chosen a saying, it took me a while to get mine ready. The text was the most difficult part to work with because I had to make sure the center of letters like an ‘a’ or an ‘o’ didn’t go missing. Finally, with the necessary areas of wood completely exposed, I began to paint.

The paints were awesome as they dried quite quickly, blended well, and were great for layering. We also had a number of different paint applicators at our disposal (the white makeup sponges were the best). I used an ombre technique, so the colours of the font faded from one shade to another. I went for touches of metallic throughout as well.

When I felt satisfied with my work, I waited a bit longer for the paint to truly dry (our host also had a fan set up for people to use, if they were impatient about the drying process). Then, I went for it. I lifted a corner of the adhered stencil and peeled. TIP: Be careful when you do this though. I didn’t realize I was pulling it off going with the grain of the wood, and the stencil ended up lifting up slivers of wood with it, meaning there are spots of my sign with lines and no stain. It’s not super noticeable, but I know those flaws are there. As soon as I figured that out, I switched to peeling from an opposite corner and I was much more successful. No more wood came off.

From start to finish the whole activity took about three hours. The three of us had an excellent time and I was itching to register for another Design A Sign event right away. It’s a chance for anyone to express their inner artist without the pressure. I find these nights to be really relaxing and just enough out of the ordinary to make it feel like something special.

Edmonton Things To Do: Plant Nite

Plants arranged in my sloped bowl.

Almost three years ago, I attended my very first Paint Nite with one of my best friends. What’s Paint Nite? Well, this company out of the States recruits artists/entrepreneurs in numerous cities to lead group painting sessions at local bars and restaurants. The premise is that attendees can grab a drink, order a bit of food, and then have a fun, uninhibited evening where creativity flows. After a couple of hours, everyone usually walks away, art in hand, feeling accomplished at their skills. I love(d) these events so much. I’ve probably been to at least a dozen and a half Paint Nites, eventually buying myself an easel, paints, canvases, and brushes to work at home, too.

Then, early last year, ads for something called Plant Nite started popping up on my social media feeds. Succulents and terrariums are all the rage right now, and it seemed that the creators of Paint Nite were cashing in on the trend with new workshops. At the time, there weren’t any sessions happening in Edmonton, but there are now!

Groupon started selling vouchers for Plant Nite either late 2017 or at the beginning of 2018. I was eager to buy a coupon, so I could go. Yet, when I first checked out the available listings on the website, most of the events had already sold out and additional dates were uploaded at a snail’s pace. Eventually, more workshops were opened up and I was able to register using a Groupon deal (regularly $29; watch out for promo codes to receive extra discounts of up to 25 per cent off).

It’s important to note that, when signing up with a voucher, the base cost of the session ($45) is discounted from the total price. What remains to be paid at the end of the transaction is the materials fee and tax. It typically works out to about $17 on top of what was paid for the coupon. Also, watch out for ones marked as “Special” or “Fundraiser” as vouchers cannot be redeemed towards those.

The Almanac’s back room was the perfect venue for Plant Nite.

Like Paint Nite, Plant Nite events take place all over the city and surrounding areas, so choose a location that works best. A friend and I attended one at The Almanac on Whyte Avenue. It was an ideal spot as their whole back room was set up just for us. Tables fit about four to six people with supplies laid out for easy access. While the hosts could have zipped through the process, getting us in and out within an hour from start to finish, they took it step by step.

Drainage rock and soil are the base of the planter.

We found ourselves on a two hour journey, receiving an education on how to properly layer our planters: use a base that allows for drainage, top it with about an inch to an inch and a half of soil for water and root retention, carefully break off the old soil from the plants — sourced from an Alberta grower — to nest them into the fresh soil, and then decorate.

A trays of succulents were given to each table as they worked on their terrariums.

Each person was given three succulents for their terrarium: String of Pearls, Baby Jade, and Echeveria. I love these dessert plants as they’re hearty. But, I have to say that, after about a month taking care of my bowl at home, I’m slightly concerned about my String of Pearls. As cute as the little vines are, one strand is dying. I think the low baring roots are having a hard time grasping the soil without me covering up much of the plant completely in the dirt and sand.

The last part, decorating, was enjoyable as we got to visit a separate station where we were able to paint river rocks. They also provided a variety of coloured moss, rocks, sand, and figurines, so we could craft our bowls into something uniquely ours. Every single planter looked different. I opted to top mine with bright orange sand, a modernly painted rock, bunches of moss, and a little owl.

My friend’s adorable creation.

Before we left, we were given instructions on how to keep our terrarium healthy. Night one requires two squirts of water around the base of each plant. The next evening, each plant should get a tablespoon of water at the base. A week later, take it up a notch with an ounce of water per plant (I actually found it was a little much). Then, walk away for three to four weeks, checking periodically to ensure that the soil shows a soft soak (only the top half should be wet).

Cardboard boxes that had housed our empty glass bowls were handed out at the end of the night, providing a practical and stable way of carrying our creations home. Had anyone been questioning the materials fee before, I don’t think they would have again after seeing the amount of work that goes into Plant Nite. There are tons of supplies that the host and their assistant need to cart around, unpack, and carry out. It’s a bit ridiculous at how much they have to consider, but they really did an awesome job.

My finished terrarium with all that orange sand.

If I could change anything, I would have thought twice about covering the whole top of my bowl with sand. Although it gives it a pretty sheen, it tends to shift more easily. With a sloped glass bowl, water also runs right down over the sand before it sinks below causing water to pool on one side rather than soaking in evenly. To help avoid that issue, I usually hold the bowl in one hand so that the opening is flat and I do my best to water around the base of the plants, allowing the liquid to soak before I place it back on the table.

Time will tell whether or not I will be able to sustain this piece of living art. I’ll definitely do my best to keep it perky. In the meantime, my next Plant Nite workshop is scheduled for mid-June at Fargo’s.

There are actually a number of great events running through June. Surprisingly, tickets aren’t disappearing as quickly anymore, so it’s easier to partake now. I suggest grabbing a friend, family member, or a whole group. Along with beverages, snacks, trivia, prizes, and music, it’s an excellent way to bond, get a little dirty, and to flex one’s green thumbs (or lack of).

Meal Kit Box & Recipe Review: Goodfood

Goodfood’s welcome card.

If anyone has been following my posts this year, they’ll have read about my experiences with Chefs Plate, MissFresh, and HelloFresh. All three of those services deliver meal kit boxes across Canada. Their aim is to simplify the prep and cooking process for those who want to eat at home, but who feel as though they don’t have the time to plan everything themselves.

In the fourth installment of this series, I’ll be talking about the last of the bunch. Goodfood is the name and they’re based out of Montreal.

Truthfully, there isn’t a whole lot more to add. All of the services function in the same way. The website lists the upcoming menus. Once satisfied with the choices, register as a member online. During the sign up, select food preferences and the weekly delivery date. If necessary, skip upcoming shipments in the calendar. Or, should the user be happy to pay full price, keep the subscription rolling on a regular basis. Boxes land at the doorstep, leading to some antics in the kitchen and an arsenal of new recipes.

Unlike the rest, Goodfood was the only one to ship with Loomis (the others opted for FedEx). While their free delivery didn’t come with a tracking number, it seemed as though the Loomis delivery guy cared a bit more. Sure, he didn’t read the instructions provided to dial our number on the intercom. However, the man did phone my cell number. When I missed his call and phoned him back a few minutes later, he answered. It was smooth going from there and he was able to bring the box right to our condo door. FedEx didn’t even bother to buzz up to be let in, often leaving our box right in the lobby of our building where anyone could grab it (luckily no one ever did).

Their insulated cardboard box used for shipping.

The packaging is also slightly different. Instead of double wall corrugated cardboard boxes, Goodfood sticks to regular cardboard with ice packs at the bottom and insulation liners covered in plastic. The felt-like material reminded me of what might be found inside the walls of a home. I was surprised to see that, but hey, it worked. Ingredients for the individual meals were also stored inside large resealable plastic bags. Certain produce, such as the leafy greens, were supplied in breathable baggies, allowing ventilation that prevented condensation and rot. The recipe cards were nicely printed with colourful photos and clear directions.

Again, we ordered three meals with two portions each. At the regular price of $74 weekly, it would work out to $12.33 per serving. Thankfully, I was able to try it for half off. The dishes we picked all rang in at 40 minutes of prep/cook time and included: Spinach & Cheese Stuffed Pork Chops with Rösti Potatoes, Ground Beef Pizza with Crispy Kale, and Haddock with Chermoula, Mejadra & Roasted Brussels Sprouts.

My fiancĂ© and I found the Pork Chops to be a hearty meal as the butterflied meat was stuffed with Swiss cheese (an extra slice or two would have really hit the spot) and spinach. The side of potato pancake made for a slightly more creative take on the typical roasted, mashed or baked variety. Our only issue came when trying to shave the potatoes down. Without a sizeable grater, we ended up having to make do with a peeler. Ultimately, it got the job done, but it could have been better with the right tools. All remaining spinach was combined with sliced carrots and a simple vinaigrette to become a side salad. I’m not usually a fan of carrots. For some reason, I find the flavour of carrots to be slightly off-putting, but these ones were so fresh and sweet that they were divine. This dinner earned a solid 7 out of 10.

Supper number two was a fun homemade Ground Beef Pizza with Crispy Kale. By the time we got to this recipe, the ready-made dough had actually risen so much that the sealed bag it was packed in was about to burst. After we cooked the ground beef and prepped the sauce — a can of Hunts tomato sauce flavoured with onion and garlic — we spread the dough out onto a rectangular baking sheet. It was then topped with the beef, onions, and some Parmesan cheese. As that baked, we also tossed a pan of kale into the oven to crisp the greens up. Those were the finishing and best touches to the pie. In all honesty, this wasn’t our favourite. There was way too much onion (half would have sufficed), the sauce was thin (a tomato paste may have been preferable), the crust was too puffy and soft, and there wasn’t enough cheese. With modifications, this could definitely be a winner. Unfortunately, in this instance, it only warrants a 5.5 out of 10.

Our third kit was the Haddock with Chermoula. What exactly is Chermoula? That’s a great question because I didn’t know. Yet, I learned that Chermoula is a type of Middle Eastern garnish consisting of parsley, vinegar, spice, and olive oil. I can’t say that either of us really enjoyed the flavour. Personally, I think there may have been an excess of vinegar, coming across as overly acidic. On the other hand, the fish was superb. Thick fillets pan fried well on the stove, and the meat was moist and flaky. Mejadra, a mix of rice, lentils, and fried onions was delicious, and went so well with the roasted Brussels sprouts. Although we could have done without that first major component of the meal, it still ended up being our favourite of the three recipes, garnering an 8 out of 10.

Looking at all of the boxes, Goodfood falls between the costly HelloFresh and slightly more affordable MissFresh and Chefs Plate. The quality of the recipes and ingredients were pretty much on par. Plus, similar to the others, Goodfood’s dishes were hit or miss, too. We were willing to chance it on new things, which turned out great. Whereas, the more familiar meals like pizza ended up being a bit of a dud. Still, these services are a fun option, especially when discounts are available. I certainly cannot justify purchasing meal kit boxes all the time, but I do understand the appeal, and I believe that they can be useful on occasion.

This review is in no way affiliated with Goodfood. I purchased these meal kits on my own and have chosen to share my thoughts here. If anyone is interested in signing up for a subscription, please use my Goodfood referral link to save $40 off of your first delivery.

Meal Kit Box & Recipe Review: HelloFresh

HelloFresh’s welcome booklet.

This year, I’ve been on a meal kit subscription kick. So far, my boxes from Chefs Plate and MissFresh were discussed in previous posts. Both Canadian businesses provide delivery across the country. Today, I’ll be talking about option number three: HelloFresh.

Unlike Chefs Plate and MissFresh, launched in 2014, HelloFresh emerged out of Berlin, Germany back in 2011. Within five years, they expanded to the UK, USA, The Netherlands, Australia, Belgium, Austria, Switzerland, and then Canada. It is one of the largest scale meal kit delivery services in the world.

Their Canadian branch is based out of Toronto and, from what I’ve received, it’s apparent that the meat and most of the produce is sourced through partnerships with local farms. Smaller items such as a packet of Bonne Maman honey comes from a family-owned French company and Colavita balsamic vinegar as well as a pack of orzo seem to be from Italy.

Similar to the other services, all of the food arrived in an insulated box shipped through FedEx. Vacuum sealed meats were ice packed at the bottom and then partitioned to separate them from the remainder of the items. All of the other ingredients were sorted into heavy paper bags that were closed and labelled with stickers that indicated the meal to which they belonged. Welcome info and recipe cards were placed at the top of the package.

Surprisingly, even though only three of the week’s available recipes were selected for my order, they provided all five cards in my box. I suppose if I’m ever inclined to try out the other options, I can actually do that. My fiancĂ© thinks HelloFresh prints the sets as a cost saver to the company because they can just toss them into every box. They don’t have to spend the time separating the cards out or printing a specific number for each recipe. He’s probably right. Either way, it’s a tiny thing, but I kind of appreciated the extras.

The individual meals and items were all packaged really well. Greens that needed to breathe were placed into resealable baggies that had perforated holes on the backside. Everything else came in sealed plastic. All components were clearly labelled. Some of the veggies had even been prepped ahead of time, shaving off several minutes of washing, cutting, chopping and dicing. Butter, oil, milk, salt, and pepper is assumed to be a staple at home already, so those are not supplied.

For my first box of three meals for two people (regularly $79.99, including free shipping), my fiancé and I picked the following recipes: Moo Shu Pork Tacos, Crispy-Skinned Chicken, and Seared Steak. Each of them took 30 minutes or less to cook and the calorie count ranged between 520 to 1,000 per portion. However, a full nutritional breakdown is not to be found unless viewing through their website.

Moo Shu Pork Tacos shifted things into gear. These were simple to make. The process pretty much required just a single pan and a couple of dishes, which is ideal when it comes to cleanup after dinner. We both loved the depth of flavour from the spice (Note: Moo Shu Spice Blend is a mix of garlic powder and ground ginger, if you want to recreate this) as well as the Sriracha mayo. With three meat and cabbage stuffed 6-inch tortillas allotted for each person, this was actually an incredibly filling meal. I can definitely see why the calorie count is much higher for this dish. My only issues with this kit were the sliced radishes (too thick) and the lack of Sriracha and mayo to make the sauce. Had there been enough mayo, it may not have been necessary for us to add extra cheese to taste. Still, after a minor change or two, this is a recipe that we’d happily make again. This selection deserves an 8 out of 10.

The Crispy-Skinned Chicken was likely our favourite of the week. This consisted of skin-on chicken breasts, smashed potatoes, roasted green beans, leeks, and a rosemary pan sauce. I did find that the chicken was a little bit greasy as we may have drizzled a bit too much oil into the pan when roasting the meat and beans. Yet, the texture of the chicken skin and flavours from the sauce and leeks helped to elevate the dish further. This was hearty without being heavy. We award this recipe an 8.5 out 10.

As experienced with Chefs Plate and MissFresh, the steak dishes were always one of the best in the bunch. Therefore, we left the Seared Steak and its accompanying roasted broccoli and warm caprese orzo salad for last. Unfortunately, HelloFresh truly disappointed. The cut of meat was sub par; even though it was cooked to medium, it was much chewier than we like our steak to be. It was also incredibly bland as they instructed the steak to be pan-seared using just a drizzle of oil and nothing else. The orzo pasta had a decent dressing made using a honey and balsamic vinegar base, but the only added pop to the entire dish came from the tart grape tomatoes and basil. Bocconcini cheese, which has an okay mouthfeel is rather flavourless without some sort of heavier dressing to go with it. Sadly, this supper only warrants a 6 out of 10.

Compared to the other meal kit subscriptions, this one is more expensive. While the others work out to $10.99 per portion for the basic plan of three meals for two people, HelloFresh is ringing in at a lofty $13.33 per person for each recipe. We found the quality of the packaging to be fantastic, but the quality of a few of the ingredients to be less than expected. On the one hand, it’s certainly convenient. On the other, the dinners were hit or miss. Should there ever be a chance for me to try a second HelloFresh box at a discounted rate, I’d be delighted to give them another go. Until then, I will have to pause deliveries as the savings aren’t quite there. If it’s feasible for you, I’d recommend testing HelloFresh yourself, so you can see if it’s a good fit for your life.

This review is in no way affiliated with HelloFresh. I purchased these meal kits on my own and have chosen to share my thoughts here. If anyone is interested in signing up for a subscription, please use my HelloFresh referral link at checkout to receive $40 off of your first delivery.