Edmonton Things To Do: Design A Sign by Paint Nite

The products of our Design A Sign night.

A few years ago, Paint Nite infiltrated Edmonton’s night life. Taking over bars across the city almost every day, it was a great way to dip one’s toes into the creative realm while hanging out with a friend or two. Combine that with drinks or food, and it was a pretty perfect evening, if I do say so myself.

I was obsessed with Paint Nite, wanting to sign up for one after another. In fact, I enjoyed the practice so much that I ended up purchasing my own portable easel, canvases, brushes, and acrylics so that I could work on art outside of those occasions, too.

Even owning all of the materials needed to do the same thing in the comfort of my home, I still attend them every so often. Simply put, it’s a fun time. As the Paint Nite brand has expanded, so have their event offerings.

I have previously tried Plant Nite (terrarium building) twice. While I always leave hopeful that my miniature gardens will survive, sadly, I’ve come to the realization that I’m probably not meant to be a plant mom. I just do not have a green thumb at this point in my life and I can’t continue to spend the money on something that will ultimately die.

Alas, the makers of Paint Nite introduced Design A Sign locally sometime last fall. It’s not exactly game changing or anything. There are already a few other businesses that run similar types of parties, but they tend to charge between $70 to $100 per person. Paint Nite is $65 plus tax each, including the $20 material charge. They also regularly offer discounts through their website, so it’s easy to participate for less than that. If you can’t find a discount directly from them, purchase a Paint Nite Groupon. Although they state that they’re for Paint or Plant Nite, I’ve tested it and the voucher is applicable towards the total cost of Design A Sign when redeeming.

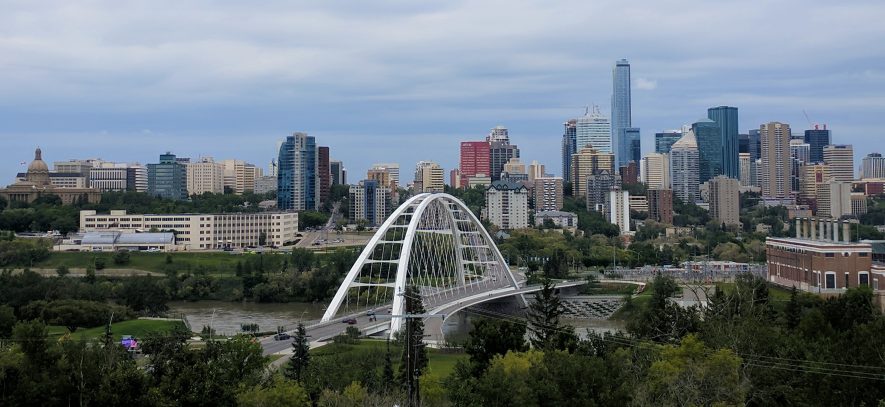
Kirk and I went to a Design A Sign night with another friend in December. It took place at Sixty 6 Bar N’ Grill inside Londonderry Mall. It seems like all of their upcoming events are happening at the same location (hopefully they’ll expand to other area around Edmonton as this is quite out of the way for us).

Waiting to get started with our stencils and wood.

We arrived early to get some food before things officially launched. The host saw us and asked if we were there for Design A Sign. When we said yes, she allowed us to pick out our pieces of wood and to save spots at one of the prepared tables. I guess for this particular event, the place where they had purchased the wood had made a mistake with sawing the pieces as some were a tad shorter than they should have been, but we got to choose first, so it wasn’t an issue for us. The cuts we selected were technically stained, too, so they already had a nice tint to them.

Once we settled in for Design A Sign, we each had to join our two slabs of wood together using flat metal braces, screws, and an electric screwdriver on the backside. We also received tiny screws and a little hanger to attach. When that was done, we flipped our now larger boards over to work on the front.

We were instructed to select a colour of paint from the many options available. I filled a small 1.5″ diameter cup with a few millimeters of acrylic and then I topped off the cup with water. Stirred together, it created a wash that I applied with cloths to the wood. The makeshift stain worked quite well, especially when using darker colours. I chose a silver paint that was much more subtle, leaving a nice shimmery sheen visible when the light hits the wood just right.

When the base dried, I then took my stencil (selected in advance when purchasing my ticket online; there are dozens of different signs to choose from) and peeled the paper backing from them. It left an adhesive that allowed the stencil to stick to the wood. Any card I could find was then used to push out the air bubbles. TIP: Upon pulling the paper backing from the stencil, try to keep the full stencil together. Don’t allow the cutouts to come up with it. By ensuring that it’s in one piece, it’ll make things much easier later.


With the stencil now attached to the wood, I could then peel off the cutouts to reveal the design. Do a thorough once over to make sure that all of the parts that should be taken away are gone. Since I had chosen a saying, it took me a while to get mine ready. The text was the most difficult part to work with because I had to make sure the center of letters like an ‘a’ or an ‘o’ didn’t go missing. Finally, with the necessary areas of wood completely exposed, I began to paint.

The paints were awesome as they dried quite quickly, blended well, and were great for layering. We also had a number of different paint applicators at our disposal (the white makeup sponges were the best). I used an ombre technique, so the colours of the font faded from one shade to another. I went for touches of metallic throughout as well.

When I felt satisfied with my work, I waited a bit longer for the paint to truly dry (our host also had a fan set up for people to use, if they were impatient about the drying process). Then, I went for it. I lifted a corner of the adhered stencil and peeled. TIP: Be careful when you do this though. I didn’t realize I was pulling it off going with the grain of the wood, and the stencil ended up lifting up slivers of wood with it, meaning there are spots of my sign with lines and no stain. It’s not super noticeable, but I know those flaws are there. As soon as I figured that out, I switched to peeling from an opposite corner and I was much more successful. No more wood came off.

From start to finish the whole activity took about three hours. The three of us had an excellent time and I was itching to register for another Design A Sign event right away. It’s a chance for anyone to express their inner artist without the pressure. I find these nights to be really relaxing and just enough out of the ordinary to make it feel like something special.

Edmonton Restaurant Review: Mexico Lindo Tacos & Grill (Sherwood Park)

Our feast was enough to feed double the people!

I’d had my eyes on Mexico Lindo Tacos & Grill for a while now. The online reviews have been stellar. So, when I noticed that Groupon was, again, offering discounts on a meal for two, I decided to snap up a voucher. Kirk and I redeemed our deal in Sherwood Park on a Sunday night.

It’s a well-designed venue with a spacious, open layout. When Kirk and I walked in, I will say that I received a lot of extended stares from other patrons. I got the sense that they don’t typically see a lot of Asians dining there regularly. It felt a little awkward at first, but the staff were friendly (it’s clearly a family run business). In the vein of knowing a Chinese or South Asian restaurant is authentic when you see others of that ethnicity happily spending their hard-earned cash there, it was the same at Mexico Lindo Tacos.

Complimentary chips with dips while we perused their menu.

Once we settled in, we perused the menu. Although the beverages we saw at other tables looked wonderful, we opted to stick with water for the evening. Instead, we split a few dishes between the two of us, including the Queso Fundido ($16.50), Quesadilla de Tres Quesos ($8.50) with Al Pastor Meat ($4), and Tacos Dorados ($12.99).

I love a stretchy cheese pull, and the Queso Fundido with Mushrooms did not disappoint. I swear the layer of Oaxaca cheese was about an inch thick. The cheese combined with the sautéed mushrooms and homemade Mexican chorizo was deliciously satisfying, and plenty, if you want to make it a meal in itself. I do recommend that you eat this first and quickly. Once the hot skillet cools down, it’s not as good because the cheese will no longer be stringy enough to scoop out easily. I’d also suggest ordering extra flour tortillas because the three that come with the dish aren’t quite enough to go with the abundance of stuffing in the pan.

Quesadillas stuffed with cheese and Al Pastor pork.

You definitely get a decent value for your money at Mexico Lindo as the Quesadilla de Tres Quesos with Al Pastor Meat was huge. I was expecting smaller flour tortilla shells as I’ve had at other eateries around Edmonton, but the plate we received held two large 8 to 10 inch wide tortillas filled with a three cheese mixture and a generous amount of shaved Al Pastor meat. The vertical spit-roasted pork was super juicy and a little bit crispy on the edges. Served with in-house guacamole and crema, this was fantastic and perfect for sharing. With the two items that we’d tried so far, there was already enough food to feed about three people.

Tacos Dorados

To finish off our meal, we had the Tacos Dorados. Unlike the other dishes we had sampled, this was prepared differently. The corn tortillas were stuffed with chicken and rolled into tubes before being fried until a crunchy shell was created. The four tortillas were then covered with shredded lettuce, crema, and queso fresco (soft, smooth, mild unaged white cheese). I have to say that the chicken tasted a tad bland inside the tortillas, but was much improved as long as it was eaten with all of the toppings.

Fresh tortilla chips with salsa

Additional to the plates we chose, Mexico Lindo Tacos also provided complimentary tortilla chips with salsa and dips to start. The salsa was refreshing on the palate and the dips featured varying degrees of heat. All of them were excellent accompaniments to the rest of our items.


We enjoyed ourselves and the atmosphere (FYI, they also have live music on Saturday nights). Perhaps another outing is required to take advantage of happy hour on weekdays between 2pm to 4pm, or their many daily deals, which are always so tempting when they come up on my social media news feeds. This is a restaurant that I’d certainly be inclined to revisit as the food and service exceeded our expectations.

Edmonton Restaurant Review: Jack’s Drive-In (Spruce Grove)

Welcome to Jack’s Drive-In

For over 55 years, Jack’s Drive-In has been a staple along First Avenue in Spruce Grove. The v-shaped roof has become an iconic landmark that has stood the test of time. Since 1961, the restaurant has called that very same spot its home.

As far as I could remember though, I’d never been to Jack’s Drive-In. I’d always just heard people talk about it. In my opinion, it was too far out of the way to visit. That changed, however, when I spotted a deal on Groupon. I ended up purchasing a voucher redeemable towards a meal for two. Valued at up to $30 (we paid $17), the coupon included two burgers, two sides, and two drinks.

When we decided to use it, we drove there on a whim. An event we attended turned out to be less than exciting and there wasn’t as much food as we expected, so we hopped in the car, and headed towards Spruce Grove to quell our hunger. Arriving at the parking lot of Jack’s Drive-In, we could see that there was a drive-thru, which only a couple of cars were utilizing. Inside, it was fairly quiet, too; a single family was hunkered down for supper.

I soaked in the ambience as I walked in. It’s so quaint with its 50s mom and pop diner style. The right wall is painted with more than life size images of Elvis and Marilyn Monroe. The booths and the stools are upholstered with bright, shimmering red vinyl, and the tables all have a vintage feel. An old juke box is even situated to one side and a wood framed TV anchored in a corner rotates through old photos of Jack’s Drive-In. The kitchen is cordoned off with an open window where customers can place their orders.

Their extensive menu is clearly laid out above the order window.

Service was really friendly. The young woman working at the front was extremely helpful in explaining their menu and suggesting the more popular items. It was also super clean. Ultimately, Kirk opted for the Jack’s Special burger with a half order of poutine and a bottle of water. I selected the Mushroom burger with a side of perogies and a cup of root beer.

The Jack’s Special burger comes with two thin patties of beef layered with pickle, cheese, ham, lettuce, and sauce. I can’t say that was my cup of tea. The ham was sort of an odd choice to me, especially after seeing that it was of the processed variety. The cheese was also American, giving it that plasticized texture. I’m not sure I fared much better with the Mushroom burger. It had the same type of cheese, the sauce was rather runny (making it incredibly messy), and the mushrooms didn’t taste fresh. In fact, the meat didn’t seem to be either. Clearly they were prefab patties that were probably previously frozen. They also lacked that charring from the grill. Considering that this is a diner that prides itself on this menu that has never changed, both of us agreed that the burgers needed some work.

On the other hand, the sides were more promising. Sadly, the poutine did not come with real cheese curds. However, the gravy was rich and not overly salted. It was hot enough to melt the cheese, and the fries were held up pretty well. The six perogies were plump, soft and a little bit crisp on the outside. I asked for bacon bits as my topping (perhaps I should have added sour cream for good measure), and, as a whole, these were delicious. I only managed to eat one as I was quite full from my burger and the poutine Kirk couldn’t finish, so the rest were taken home as leftovers.

My burger with our two sides and my root beer.

I will have to go back at some point to try their milkshakes and maybe to grab some of the other sides available on the menu, but the burgers are kind of mediocre. More than anything, it’s a cute place with a great Albertan story, and, personally, I think the place remains mostly due to the nostalgia factor. It seems that a lot of people have many wonderful memories associated with the eatery. As long as that continues to hold true, I’m guessing that there will always be someone willing to keep Jack’s Drive-In alive for many more years to come.

Edmonton Things To Do: Plant Nite

Plants arranged in my sloped bowl.

Almost three years ago, I attended my very first Paint Nite with one of my best friends. What’s Paint Nite? Well, this company out of the States recruits artists/entrepreneurs in numerous cities to lead group painting sessions at local bars and restaurants. The premise is that attendees can grab a drink, order a bit of food, and then have a fun, uninhibited evening where creativity flows. After a couple of hours, everyone usually walks away, art in hand, feeling accomplished at their skills. I love(d) these events so much. I’ve probably been to at least a dozen and a half Paint Nites, eventually buying myself an easel, paints, canvases, and brushes to work at home, too.

Then, early last year, ads for something called Plant Nite started popping up on my social media feeds. Succulents and terrariums are all the rage right now, and it seemed that the creators of Paint Nite were cashing in on the trend with new workshops. At the time, there weren’t any sessions happening in Edmonton, but there are now!

Groupon started selling vouchers for Plant Nite either late 2017 or at the beginning of 2018. I was eager to buy a coupon, so I could go. Yet, when I first checked out the available listings on the website, most of the events had already sold out and additional dates were uploaded at a snail’s pace. Eventually, more workshops were opened up and I was able to register using a Groupon deal (regularly $29; watch out for promo codes to receive extra discounts of up to 25 per cent off).

It’s important to note that, when signing up with a voucher, the base cost of the session ($45) is discounted from the total price. What remains to be paid at the end of the transaction is the materials fee and tax. It typically works out to about $17 on top of what was paid for the coupon. Also, watch out for ones marked as “Special” or “Fundraiser” as vouchers cannot be redeemed towards those.

The Almanac’s back room was the perfect venue for Plant Nite.

Like Paint Nite, Plant Nite events take place all over the city and surrounding areas, so choose a location that works best. A friend and I attended one at The Almanac on Whyte Avenue. It was an ideal spot as their whole back room was set up just for us. Tables fit about four to six people with supplies laid out for easy access. While the hosts could have zipped through the process, getting us in and out within an hour from start to finish, they took it step by step.

Drainage rock and soil are the base of the planter.

We found ourselves on a two hour journey, receiving an education on how to properly layer our planters: use a base that allows for drainage, top it with about an inch to an inch and a half of soil for water and root retention, carefully break off the old soil from the plants — sourced from an Alberta grower — to nest them into the fresh soil, and then decorate.

A trays of succulents were given to each table as they worked on their terrariums.

Each person was given three succulents for their terrarium: String of Pearls, Baby Jade, and Echeveria. I love these dessert plants as they’re hearty. But, I have to say that, after about a month taking care of my bowl at home, I’m slightly concerned about my String of Pearls. As cute as the little vines are, one strand is dying. I think the low baring roots are having a hard time grasping the soil without me covering up much of the plant completely in the dirt and sand.

The last part, decorating, was enjoyable as we got to visit a separate station where we were able to paint river rocks. They also provided a variety of coloured moss, rocks, sand, and figurines, so we could craft our bowls into something uniquely ours. Every single planter looked different. I opted to top mine with bright orange sand, a modernly painted rock, bunches of moss, and a little owl.

My friend’s adorable creation.

Before we left, we were given instructions on how to keep our terrarium healthy. Night one requires two squirts of water around the base of each plant. The next evening, each plant should get a tablespoon of water at the base. A week later, take it up a notch with an ounce of water per plant (I actually found it was a little much). Then, walk away for three to four weeks, checking periodically to ensure that the soil shows a soft soak (only the top half should be wet).

Cardboard boxes that had housed our empty glass bowls were handed out at the end of the night, providing a practical and stable way of carrying our creations home. Had anyone been questioning the materials fee before, I don’t think they would have again after seeing the amount of work that goes into Plant Nite. There are tons of supplies that the host and their assistant need to cart around, unpack, and carry out. It’s a bit ridiculous at how much they have to consider, but they really did an awesome job.

My finished terrarium with all that orange sand.

If I could change anything, I would have thought twice about covering the whole top of my bowl with sand. Although it gives it a pretty sheen, it tends to shift more easily. With a sloped glass bowl, water also runs right down over the sand before it sinks below causing water to pool on one side rather than soaking in evenly. To help avoid that issue, I usually hold the bowl in one hand so that the opening is flat and I do my best to water around the base of the plants, allowing the liquid to soak before I place it back on the table.

Time will tell whether or not I will be able to sustain this piece of living art. I’ll definitely do my best to keep it perky. In the meantime, my next Plant Nite workshop is scheduled for mid-June at Fargo’s.

There are actually a number of great events running through June. Surprisingly, tickets aren’t disappearing as quickly anymore, so it’s easier to partake now. I suggest grabbing a friend, family member, or a whole group. Along with beverages, snacks, trivia, prizes, and music, it’s an excellent way to bond, get a little dirty, and to flex one’s green thumbs (or lack of).

Meal Kit Box & Recipe Review: Goodfood

Goodfood’s welcome card.

If anyone has been following my posts this year, they’ll have read about my experiences with Chefs Plate, MissFresh, and HelloFresh. All three of those services deliver meal kit boxes across Canada. Their aim is to simplify the prep and cooking process for those who want to eat at home, but who feel as though they don’t have the time to plan everything themselves.

In the fourth installment of this series, I’ll be talking about the last of the bunch. Goodfood is the name and they’re based out of Montreal.

Truthfully, there isn’t a whole lot more to add. All of the services function in the same way. The website lists the upcoming menus. Once satisfied with the choices, register as a member online. During the sign up, select food preferences and the weekly delivery date. If necessary, skip upcoming shipments in the calendar. Or, should the user be happy to pay full price, keep the subscription rolling on a regular basis. Boxes land at the doorstep, leading to some antics in the kitchen and an arsenal of new recipes.

Unlike the rest, Goodfood was the only one to ship with Loomis (the others opted for FedEx). While their free delivery didn’t come with a tracking number, it seemed as though the Loomis delivery guy cared a bit more. Sure, he didn’t read the instructions provided to dial our number on the intercom. However, the man did phone my cell number. When I missed his call and phoned him back a few minutes later, he answered. It was smooth going from there and he was able to bring the box right to our condo door. FedEx didn’t even bother to buzz up to be let in, often leaving our box right in the lobby of our building where anyone could grab it (luckily no one ever did).

Their insulated cardboard box used for shipping.

The packaging is also slightly different. Instead of double wall corrugated cardboard boxes, Goodfood sticks to regular cardboard with ice packs at the bottom and insulation liners covered in plastic. The felt-like material reminded me of what might be found inside the walls of a home. I was surprised to see that, but hey, it worked. Ingredients for the individual meals were also stored inside large resealable plastic bags. Certain produce, such as the leafy greens, were supplied in breathable baggies, allowing ventilation that prevented condensation and rot. The recipe cards were nicely printed with colourful photos and clear directions.

Again, we ordered three meals with two portions each. At the regular price of $74 weekly, it would work out to $12.33 per serving. Thankfully, I was able to try it for half off. The dishes we picked all rang in at 40 minutes of prep/cook time and included: Spinach & Cheese Stuffed Pork Chops with Rösti Potatoes, Ground Beef Pizza with Crispy Kale, and Haddock with Chermoula, Mejadra & Roasted Brussels Sprouts.

My fiancé and I found the Pork Chops to be a hearty meal as the butterflied meat was stuffed with Swiss cheese (an extra slice or two would have really hit the spot) and spinach. The side of potato pancake made for a slightly more creative take on the typical roasted, mashed or baked variety. Our only issue came when trying to shave the potatoes down. Without a sizeable grater, we ended up having to make do with a peeler. Ultimately, it got the job done, but it could have been better with the right tools. All remaining spinach was combined with sliced carrots and a simple vinaigrette to become a side salad. I’m not usually a fan of carrots. For some reason, I find the flavour of carrots to be slightly off-putting, but these ones were so fresh and sweet that they were divine. This dinner earned a solid 7 out of 10.

Supper number two was a fun homemade Ground Beef Pizza with Crispy Kale. By the time we got to this recipe, the ready-made dough had actually risen so much that the sealed bag it was packed in was about to burst. After we cooked the ground beef and prepped the sauce — a can of Hunts tomato sauce flavoured with onion and garlic — we spread the dough out onto a rectangular baking sheet. It was then topped with the beef, onions, and some Parmesan cheese. As that baked, we also tossed a pan of kale into the oven to crisp the greens up. Those were the finishing and best touches to the pie. In all honesty, this wasn’t our favourite. There was way too much onion (half would have sufficed), the sauce was thin (a tomato paste may have been preferable), the crust was too puffy and soft, and there wasn’t enough cheese. With modifications, this could definitely be a winner. Unfortunately, in this instance, it only warrants a 5.5 out of 10.

Our third kit was the Haddock with Chermoula. What exactly is Chermoula? That’s a great question because I didn’t know. Yet, I learned that Chermoula is a type of Middle Eastern garnish consisting of parsley, vinegar, spice, and olive oil. I can’t say that either of us really enjoyed the flavour. Personally, I think there may have been an excess of vinegar, coming across as overly acidic. On the other hand, the fish was superb. Thick fillets pan fried well on the stove, and the meat was moist and flaky. Mejadra, a mix of rice, lentils, and fried onions was delicious, and went so well with the roasted Brussels sprouts. Although we could have done without that first major component of the meal, it still ended up being our favourite of the three recipes, garnering an 8 out of 10.

Looking at all of the boxes, Goodfood falls between the costly HelloFresh and slightly more affordable MissFresh and Chefs Plate. The quality of the recipes and ingredients were pretty much on par. Plus, similar to the others, Goodfood’s dishes were hit or miss, too. We were willing to chance it on new things, which turned out great. Whereas, the more familiar meals like pizza ended up being a bit of a dud. Still, these services are a fun option, especially when discounts are available. I certainly cannot justify purchasing meal kit boxes all the time, but I do understand the appeal, and I believe that they can be useful on occasion.

This review is in no way affiliated with Goodfood. I purchased these meal kits on my own and have chosen to share my thoughts here. If anyone is interested in signing up for a subscription, please use my Goodfood referral link to save $40 off of your first delivery.