Edmonton Things To Do: 4Cats Arts Studio Clay Party (Summerside Location)

The entrance to 4Cats Arts Studio Summerside.

This is a quick shout out to 4Cats Arts Studio in Edmonton’s Summerside area. Run by Michelle, this is one of the few locations that is still independent of head office. Although it probably caters mostly to camps for children and kids events, workshops can be booked for adults, too. They offer painting (acrylic or splatter), pouring, and clay parties (and sometimes clay wheel classes) for the older lot.

My bachelorette clay party!

Since I’ve never been much of a bar goer, for my bachelorette, my bridesmaids planned an afternoon at 4Cats Arts Studio where we were to create sloth mugs/planters molded out of clay. Eight of us attended at a cost of $25 per person. The large group table was laid out with settings for each of us. Once we’d all taken our seats, Michelle led us through the process from start to finish while her assistant handed out extra supplies.

The project was one that anyone could do. We didn’t have to master the use of a clay wheel. All we needed was clay, templates, a rolling pin, water, a brush, a pointed tool, our hands, and some paint.

Tips:

  1. Roll out the clay by putting your body weight on the middle of the rolling pin and not by using the handles. It’s a lot easier. Make sure the clay stays about half a centimeter thick, and don’t manipulate it with your hands too much, otherwise it’ll dry out and crack.
  2. To join pieces, use the scratch and slip method. Take the pointed tool and scratch X marks on both of the pieces at the points where they need to come together. Apply a little bit of water to each side and they should stick. Use your fingers to gently meld the pieces by “erasing” the joints. For hard to reach spots, take a bit of water and a brush to close up the crevices.
  3. If you want an interesting texture, roll the clay out over the canvas and use the canvas side as the outer part of the cup. You can keep a more rustic feel by leaving the clay unpainted, so it stays rough and textured as opposed to smooth and glossy when it’s coated with paint.
  4. The grey colour of the clay will actually turn to an off-white colour after it’s burned in the kiln. If you like the white, you don’t have to paint it to cover it up.

While we had selected the sloth pattern for our workshop, Michelle was nice enough to show us a number of other possibilities. Most of my friends still stuck with the sloth (every single one looked unique), but a couple of them ventured out and made a bunny or a dog instead. Because of the nature of clay and the fact that our cups still had to be fired in the kiln, we weren’t able to take our creations home right away; I’m definitely looking forward to seeing all of the finished products when they’re ready though.

Ultimately, it was a really relaxing activity for about two hours. Admittedly, each person was kind of in their own world at times, yet the ambiance is perfect to gather a larger group for a catch up while crafting. We were warned that the clay could get messy. But, with the provided aprons, we all managed to keep our clothes clean. Our hands were the only things that got a bit dirty (don’t wear your jewelry while manipulating the clay); however, a quick rinse with water was enough to remove any residue.

I’m not sure if 4Cats Arts Studio is still pre-scheduling many adult workshops into their calendar. Nevertheless, if you’re interested in setting something up for an event or just a fun meetup for your friends and family, it’s an excellent and creative option. Michelle is a wonderful host who provides great instruction and keeps things spirited throughout.

Edmonton Things To Do: Design A Sign by Paint Nite

The products of our Design A Sign night.

A few years ago, Paint Nite infiltrated Edmonton’s night life. Taking over bars across the city almost every day, it was a great way to dip one’s toes into the creative realm while hanging out with a friend or two. Combine that with drinks or food, and it was a pretty perfect evening, if I do say so myself.

I was obsessed with Paint Nite, wanting to sign up for one after another. In fact, I enjoyed the practice so much that I ended up purchasing my own portable easel, canvases, brushes, and acrylics so that I could work on art outside of those occasions, too.

Even owning all of the materials needed to do the same thing in the comfort of my home, I still attend them every so often. Simply put, it’s a fun time. As the Paint Nite brand has expanded, so have their event offerings.

I have previously tried Plant Nite (terrarium building) twice. While I always leave hopeful that my miniature gardens will survive, sadly, I’ve come to the realization that I’m probably not meant to be a plant mom. I just do not have a green thumb at this point in my life and I can’t continue to spend the money on something that will ultimately die.

Alas, the makers of Paint Nite introduced Design A Sign locally sometime last fall. It’s not exactly game changing or anything. There are already a few other businesses that run similar types of parties, but they tend to charge between $70 to $100 per person. Paint Nite is $65 plus tax each, including the $20 material charge. They also regularly offer discounts through their website, so it’s easy to participate for less than that. If you can’t find a discount directly from them, purchase a Paint Nite Groupon. Although they state that they’re for Paint or Plant Nite, I’ve tested it and the voucher is applicable towards the total cost of Design A Sign when redeeming.

Kirk and I went to a Design A Sign night with another friend in December. It took place at Sixty 6 Bar N’ Grill inside Londonderry Mall. It seems like all of their upcoming events are happening at the same location (hopefully they’ll expand to other area around Edmonton as this is quite out of the way for us).

Waiting to get started with our stencils and wood.

We arrived early to get some food before things officially launched. The host saw us and asked if we were there for Design A Sign. When we said yes, she allowed us to pick out our pieces of wood and to save spots at one of the prepared tables. I guess for this particular event, the place where they had purchased the wood had made a mistake with sawing the pieces as some were a tad shorter than they should have been, but we got to choose first, so it wasn’t an issue for us. The cuts we selected were technically stained, too, so they already had a nice tint to them.

Once we settled in for Design A Sign, we each had to join our two slabs of wood together using flat metal braces, screws, and an electric screwdriver on the backside. We also received tiny screws and a little hanger to attach. When that was done, we flipped our now larger boards over to work on the front.

We were instructed to select a colour of paint from the many options available. I filled a small 1.5″ diameter cup with a few millimeters of acrylic and then I topped off the cup with water. Stirred together, it created a wash that I applied with cloths to the wood. The makeshift stain worked quite well, especially when using darker colours. I chose a silver paint that was much more subtle, leaving a nice shimmery sheen visible when the light hits the wood just right.

When the base dried, I then took my stencil (selected in advance when purchasing my ticket online; there are dozens of different signs to choose from) and peeled the paper backing from them. It left an adhesive that allowed the stencil to stick to the wood. Any card I could find was then used to push out the air bubbles. TIP: Upon pulling the paper backing from the stencil, try to keep the full stencil together. Don’t allow the cutouts to come up with it. By ensuring that it’s in one piece, it’ll make things much easier later.


With the stencil now attached to the wood, I could then peel off the cutouts to reveal the design. Do a thorough once over to make sure that all of the parts that should be taken away are gone. Since I had chosen a saying, it took me a while to get mine ready. The text was the most difficult part to work with because I had to make sure the center of letters like an ‘a’ or an ‘o’ didn’t go missing. Finally, with the necessary areas of wood completely exposed, I began to paint.

The paints were awesome as they dried quite quickly, blended well, and were great for layering. We also had a number of different paint applicators at our disposal (the white makeup sponges were the best). I used an ombre technique, so the colours of the font faded from one shade to another. I went for touches of metallic throughout as well.

When I felt satisfied with my work, I waited a bit longer for the paint to truly dry (our host also had a fan set up for people to use, if they were impatient about the drying process). Then, I went for it. I lifted a corner of the adhered stencil and peeled. TIP: Be careful when you do this though. I didn’t realize I was pulling it off going with the grain of the wood, and the stencil ended up lifting up slivers of wood with it, meaning there are spots of my sign with lines and no stain. It’s not super noticeable, but I know those flaws are there. As soon as I figured that out, I switched to peeling from an opposite corner and I was much more successful. No more wood came off.

From start to finish the whole activity took about three hours. The three of us had an excellent time and I was itching to register for another Design A Sign event right away. It’s a chance for anyone to express their inner artist without the pressure. I find these nights to be really relaxing and just enough out of the ordinary to make it feel like something special.

Edmonton Things To Do: Art Gallery of Alberta Adult Drop-In Studio

Tons of Ideas by Vera Gartley

Earlier this summer, I was making plans with a friend of mine. Due to scheduling conflicts, it was somewhat difficult to find a time that worked for both of us to get together. Futhermore, I didn’t want to do our typical thing of just going for dinner or doing a Paint Nite event. So, I started to scour the internet for ideas of what else we could do in Edmonton.

Honestly, I don’t even know how I eventually ended up on the Art Gallery of Alberta (AGA) website, but I did. What I found is that they actually offer a weekly Adult Drop-In Studio every Wednesday night. While that particular day of the week didn’t work for her, I was intrigued and I wanted to check out a few of those sessions for myself. I gathered other friends of mine and I made it to three different classes over the span of September.

The first one I went to, I phoned ahead to reserve spaces for me and my friends because I wasn’t sure what kind of attendance to expect (there is a maximum of 20 spaces). You are able to hold spots the day of the drop-in, but you do have to provide payment info at that time. You can phone it in and pick up the tickets at guest services upon arrival at the gallery, or you can walk-in and pay in person.

Tickets are $18 plus tax per person and that includes all of the materials that you’ll be using. The price point is stellar for a two hour activity, especially when compared to the majority of other creative events running throughout the city.

As it turns out, reservations weren’t really necessary. Only half a dozen people showed up for printmaking the first night. Initially, there didn’t seem to be a whole lot of direction. The website had indicated that we would be doing lino carving with a theme of cityscapes. Yet, it pretty much turned into a freestyle situation in that we weren’t at all limited. Everyone was allowed to design whatever they wanted, and guidance only came into play once we started doing more of the printmaking itself.

In fact, I loved printmaking so much that I made my way to Delta Art & Drafting Supply that weekend in order to pick up all of the materials needed to do the same thing at home (I have a couple of special projects planned). Thankfully, there was a sale going on.

The following week, my colleague and I ventured out into the cold to make it to the AGA for their Floral Studies drop-in. We arrived a little bit late, but, once we paid, we managed to catch the group of about ten people as they were heading up to the galleries. The instructor for the night wanted us to take inspiration from an exhibit called Vanitas by artist Samantha Walrod. She turned the RBC Work Room (a studio-like residence space) from an empty gallery into several pieces of finished art that explored the idea of life and loss using floral imagery and the passing of time. Her work utilizes layering through multiple mediums like collage, ink and paint.

I was kind of hoping that we would be doing something similar to what we’d seen. Instead, the focus was more on learning to work with chalk pastels and acrylic paints together. Not quite what I expected. Still, I managed to learn some new ways of applying colour and paint to paper, as well as creating my own colours using pigments from the chalk pastels and mixing it with the acrylics.

Finished Japanese stab bounded books.

The final session that I made it to was about book binding. I failed to take photos during this one, but I do have a picture of the finished products. We were taught how to put our own travel journals together using just paper, a couple of binder clips, a push pin, a needle and some thread. We used a simple Japanese stab process, which is easily searchable on Google or YouTube. After we each completed two books, we took them up to the James Wilson Morris gallery where we practiced our sketching techniques (i.e. shading, blind contour, gesture, etc.).

All of these turned out to be fun in their own unique ways. I’ve got my eye on a silk screening class in early-November, but in the meantime, they have a variety of other drop-ins like plaster casting or slow stitch through October. Additionally, if you show up to the gallery early, you can take advantage of the All Access Evenings. Those happen every Tuesday and Wednesday from 5pm to 8pm and it grants all patrons entrance to the exhibits for free.

The Art Gallery of Alberta is definitely making an effort to increase the accessibility and affordability of art and art-related activities. Don’t miss out. Sure, not every workshop is going to call to you, but in the scope of a year, there’s bound to be something that will get your creative juices flowing. Keep an eye on the AGA calendar and carve out some time at this local gem of an institution.

Edmonton Things To Do: 4Cats Arts Studio

Me with my finished piece.

Recently, my friend and I wanted to get together to do something crafty. But, we didn’t know what. A number of events we’d found — everything from cross stitching to terrarium building — were just a bit too pricey. So, I did some digging. Eventually, I came across 4Cats Arts Studios.

The company, founded in Victoria, British Columbia, has been around since 2005. Within six years, they had franchised out their name and business structure to locations across Canada, the United States, and Australia. In the Edmonton area, there are now three studios. One is in St. Albert, the second is in the north of the city, and the third sits in the southeastern neighbourhood of Summerside (this is the one we went to).

They hold a variety of workshops for kids and adults where patrons can paint canvases, decorate mugs or bowls, create clay planters, or mould figurines. Prices are $25 per participant, but they offer two spots for $35 when registering together. Currently, it looks like a variety of sessions are available through to the end of June. Then, in the summer months of July to August, 4Cats will strictly be running summer camps.

The two of us ended up enrolling in a painting workshop called ‘I Dream In Gold.’ It took place on a Friday evening at 6:30pm. We bused it there from Century Park, which was quite convenient as transport stops right on the block of the storefront. Arriving a little early, we used the time to snap photos of the studio space. It’s bright and colourful, likely drawing the attention of the kids who come in for classes. There were rolled and stretched canvases tucked everywhere, too, probably awaiting pick up. 4Cats even has a number of branded products for sale, including tempera paints (regular and glitter), gold foil sheets, note books, figurine kits, etc.

Check out this fun room!

As the start time drew closer, we were taken to the back room. The three open walls (artfully splattered in paint) had been stapled with about a dozen square-shaped black canvas sheets. There were no chairs. This was standing only. If one isn’t too keen on putting their personal belongings out of sight in the adjoining area, I suggest wearing pants with pockets to hold phones and cards/cash (keep it light) as there isn’t really space to keep things nearby. Tucking items underneath the benches may be possible, but I didn’t try that. I decided to turn my jacket inside out and wrap it around my purse, letting those items sit on the bench below my canvas. It kind of worked for me. Still, there’s a chance of getting stuff dirty that way, so make a judgement call.

Other participants working on their pieces. They all turned out so differently!

Similar to Paint Nite, there is a host/instructor who will take everyone through the process of completing the piece step-by-step. She worked through faster and, when needed, she asked the participants to pause as she showed the next stage. This allowed us to go at our own pace while still seeing what was ahead. They actually had a number of  paint jars opened with a bunch of different colours available for use. Also, rather than brushes at 4Cats, for this workshop, we mostly used sponges to apply the colours. As a result, our hands were a total mess afterwards. To clean up, they had a washing station that consisted of a bucket of soapy water and a communal hand towel. I opted to use the sink in their washroom instead.

Once we were satisfied with our paint application, we grabbed some brushes, glue, and gold foil to decorate our canvases. I only used one metallic sheet, but several people opted to add more. The foil itself is super delicate, tending to break apart very easily as it’s manipulated. If there’s anything sticky on one’s hands, the gold will also stay there rather than adhering to the canvas. I do love how it brings dimension to the art though, and I’d be happy to try this medium again.

I think the whole workshop took a total of an hour and a half from beginning to end. Since the paints dry quickly, the art can be taken home on the same night. However, the canvas won’t be mounted or framed. Having it stretched on a wooden frame costs an additional $25 when the service is purchased the day of or $35 should one choose to return later. Leaving it behind for stretching means another trip back when it’s ready (my friend was told it could be about two to three weeks). I, on the other hand, chose to carry my canvas as is. I’ll figure out what to do with it on my own.

Considering the cost per person, 4Cats Arts Studio is quite affordable for a creative night out with friends or with the kiddos, especially if extra services aren’t required of 4Cats after the fact. It’s not really going to break the bank compared to many other crafty options in Edmonton, and it’ll get the artistic juices flowing all the same.

Edmonton Happenings: MINBID MINBattle 2018 Launch Party & Art Battle

Co-founder of MINBID, Michel Côté, was one of the artists drawn to participate.

From what I know, MINBID (short for Minimum Bid) has existed for at least 5 years in the underground art scene of Edmonton. The collective began as a gathering of local creators; it gave them an outlet to share work with their peers and the public. The showings doubled as auction events, too, providing a way for artists to gauge the value of their pieces based on the highest bid received.

The banner ad for their 2018 MINBattle.

One of the things that MINBID has become known for is their annual MINBattle. Friday, May 11 marked the launch of the 2018 series and my initial visit to one of their functions. Kicking off at Vacancy Hall (103 Avenue and 104 Street), sixteen artists registered, but only eight had the opportunity to compete through a lottery draw. There were two rounds of four contestants. Each person had an hour to complete a 24 inch x 24 inch canvas.

Audience members voted with tickets stubs dropped into each artist’s bucket. Bids for the finished pieces could also be placed on the cards.

A group of three to four judges circled the room as they all painted. Audience members even got to partake in the judging process with ticket stubs to be deposited as a vote towards their favourite in both rounds. Plus, all of the pieces were up for auction with bidding starting at $50 and going up in increments of $10. The selling price would count in the final tally of each artist’s score as well. Whoever prevailed in each round (we didn’t stay for the announcement of the winners) will move on to the final MINBattle later this summer.

Co-founder Darren Bolz DJ’d throughout the evening.

Speaking to Darren Bolz, one of the co-founders of MINBID and the evening’s DJ, we found out that this is the first time they’ve used this particular format. Usually they’ve only had two artists battle head-to-head on any given night. This year, they thought they’d change things up, bringing in multiple artists at a time with the top two at each battle duking it out in a huge showdown later this year.

For the launch event, the ticket price was $25 plus fees in advance through their website or Eventbrite. At the door, the cost was $30. Although notes on the Eventbrite page said the cost covers gallery membership, it’s not like buyers receive a card or anything. Ultimately, the money simply covers entrance and the open bar.

Bartender for the night was Christopher Hughes.

Speaking of the bar, it could have been a little more diverse. There were only four drinks available, which I realize is essential to keeping things easy for the organizers, especially in a space that isn’t equipped for bar service. However, the options were so-so, and there was only one non-alcoholic choice. It was a PC brand watermelon soda that was sweet. I think offering just a simple cup or bottle of water would have been appreciated. Not everyone wants something carbonated and sugary to drink. Water would have been a nice alternative to help cool off in the warm space.

The lighting in the space is dim to create a non-intimidating vibe for the artists, allowing them to work without feeling too exposed.

They also struggled a bit with lighting in the basement of the Mercer Warehouse. In order to keep the vibe, the lighting has to be relatively dim. Nevertheless, it’s equally as important to allow enough brightness for the artists, which means there’s a balancing act that’s required. Being that this is a nighttime event, the place emptied out quite a bit by the second round. Yes, it’s unfortunate that people didn’t stick around to watch it all unfold. But, if I’m being honest, I was happy for the extra breathing room.

The participating artists were allowed to paint whatever they wanted within the allotted time, leaving it open ended. Still, if they haven’t already done this in the past, I think it could be very interesting to see them paint to a specified theme. It’d add another dimension to the competition. Additionally, for those not already in the Edmonton art industry and who didn’t know the competitors personally, it would have been beneficial for the emcee to announce the names of the artists before they started each battle

There was only one person, Peter Gegolick, who blatantly advertised himself and had a sort of “I don’t give a shit” attitude as he painted while wearing sunglasses. He actually had a finished piece of art already hanging on the gallery wall with an asking minimum bid of $700 (his battle piece could have been purchased for less than $100). The rest of them were pretty low key. While their first names were listed on the bidding cards, their last names weren’t always there, so it was otherwise hard to follow-up on some of the artists after the fact.

Another piece from Michel Côté was hanging in the MINBID gallery for sale.

I understand that one of the goals of these parties is to assist artists in determining how their work should be priced. It’s a bit of a catch-22 to do that though. I mean, it’s entirely reliant upon the audience that shows up. If there are people with the income and they happen to like the work they see, there’s a chance that a piece will go for much more. But, based on this particular event, I’d say it was mostly a youthful crowd that didn’t necessarily have the money to burn. Most didn’t seem willing to shell out the extra cash after what they spent on the actual event ticket.

The 2016 MIN Royale breakdown.

Maybe I’m wrong and it was an anomaly, or maybe they simply didn’t like what they saw. Either way, this aspect kept the number of bids to a minimum and kept the overall price of the bids low with most going for under $100. For comparison, I looked at how much battle auction pieces went for back in 2016. Of the 30 creations born out of MINBattle events, a dozen sold for over $150. That included one from my favourite artist of the 2018 launch night, Reece Schulte, that went for a cool $450.
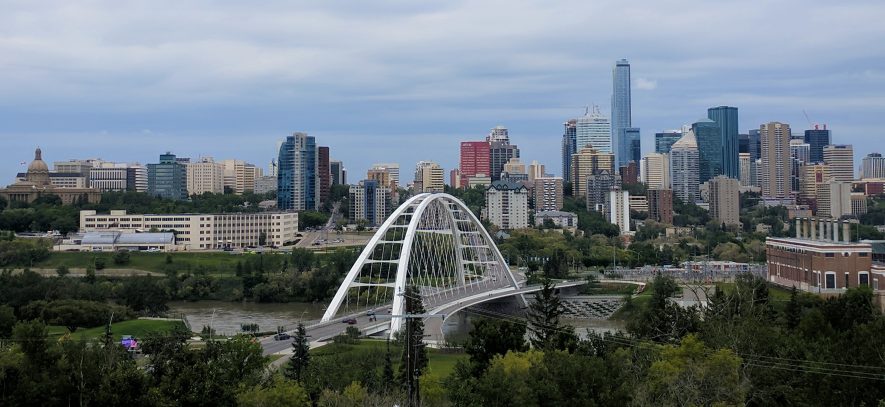
I loved his dynamic Edmonton skyline piece so much that I put a couple of bids on it to the tune of $90 (this was a total steal). I left my name and number on the bidding card and walked away. Since the art is still wet on the evening of the event, they just phone or text the winning bidder to make arrangements for pickup and payment (either cash or credit is accepted) over the following week. Sadly, I didn’t end up hearing from MINBID by the end of the weekend, so I assumed someone else swooped in at the last second to snag it. Then, to my surprise, I received a message on Monday afternoon. It turns out that the person who outbid me couldn’t be reached, so it went to the next highest bidder! I’m super excited to add Reece’s work to my modest art collection.

Aside from the late start (listed as 9:00pm, yet didn’t truly begin until 10:30pm) and the crowdedness of the venue during the first round of the evening, my fiancĂ© and I left with an awesome appreciation of what MINBID and MINBattle had to offer. Sure, I initially felt a little out of place. The majority of the other attendees came across as younger and artsier than me.

Nonetheless, MINBattle certainly made for a different kind of date night where we got to experience something new to us. We had some drinks, danced to music, mingled with the artists, and watched canvases come to life. What I like best is that it’s an excellent way to potentially find and buy art for an affordable price.

The next MINBattle event date is still to be determined. Make sure to sign up for their newsletter through the MINBID website to be kept in the loop. In the meantime, think about attending their Udell X & MINBID Collaboration (buy tickets here). Two parties will take place at the Udell Xhibitions Gallery (103 Avenue and 124 Street) on June 22 and 23. Any art aficionado won’t be disappointed. I know that we’re definitely looking forward to our second outing.

UX MB Art Xhibition + Auction